Projects
Any Missing Maps member can request a MapSwipe project. If you want to add a new project but aren’t sure how, reach out to the MapSwipe community on Slack first.
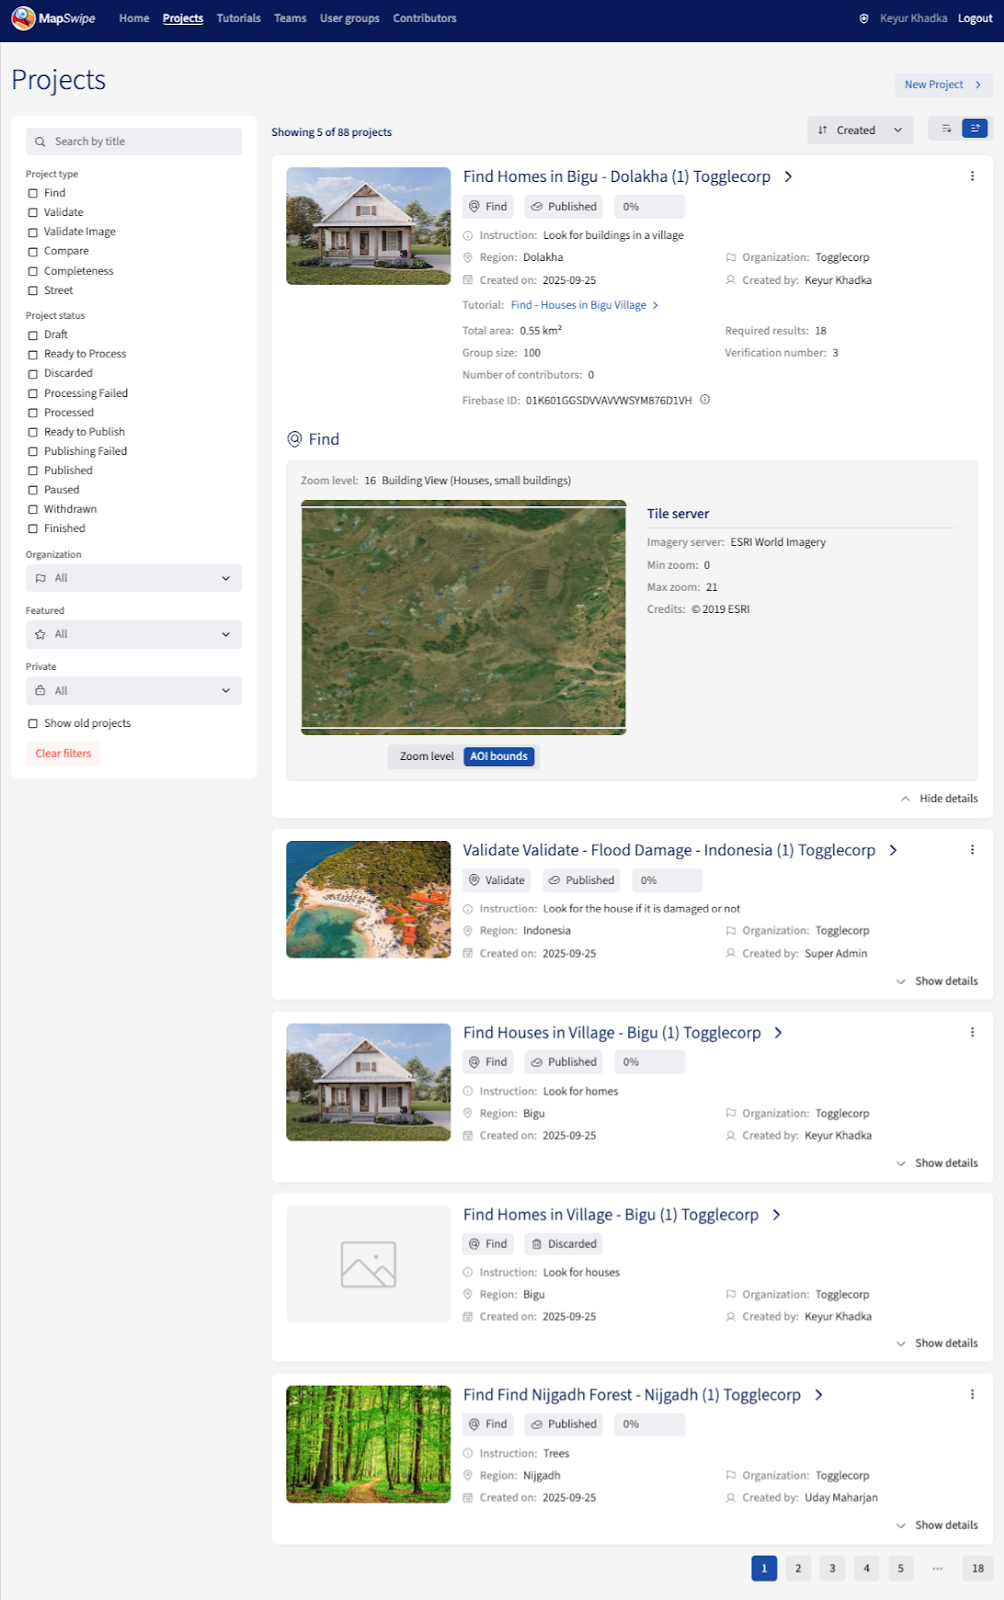
All projects are listed on the Project page of the Manager Dashboard. Managers can filter the list and expand each entry with the Show details button to inspect a project.
Creating a Project
To set up a new project, sign in to the Manager Dashboard with your MapSwipe account. You’ll need dedicated project manager credentials — reach out to the MapSwipe community if you don’t have them yet. Once signed in, you’ll see a home screen similar to the one below.

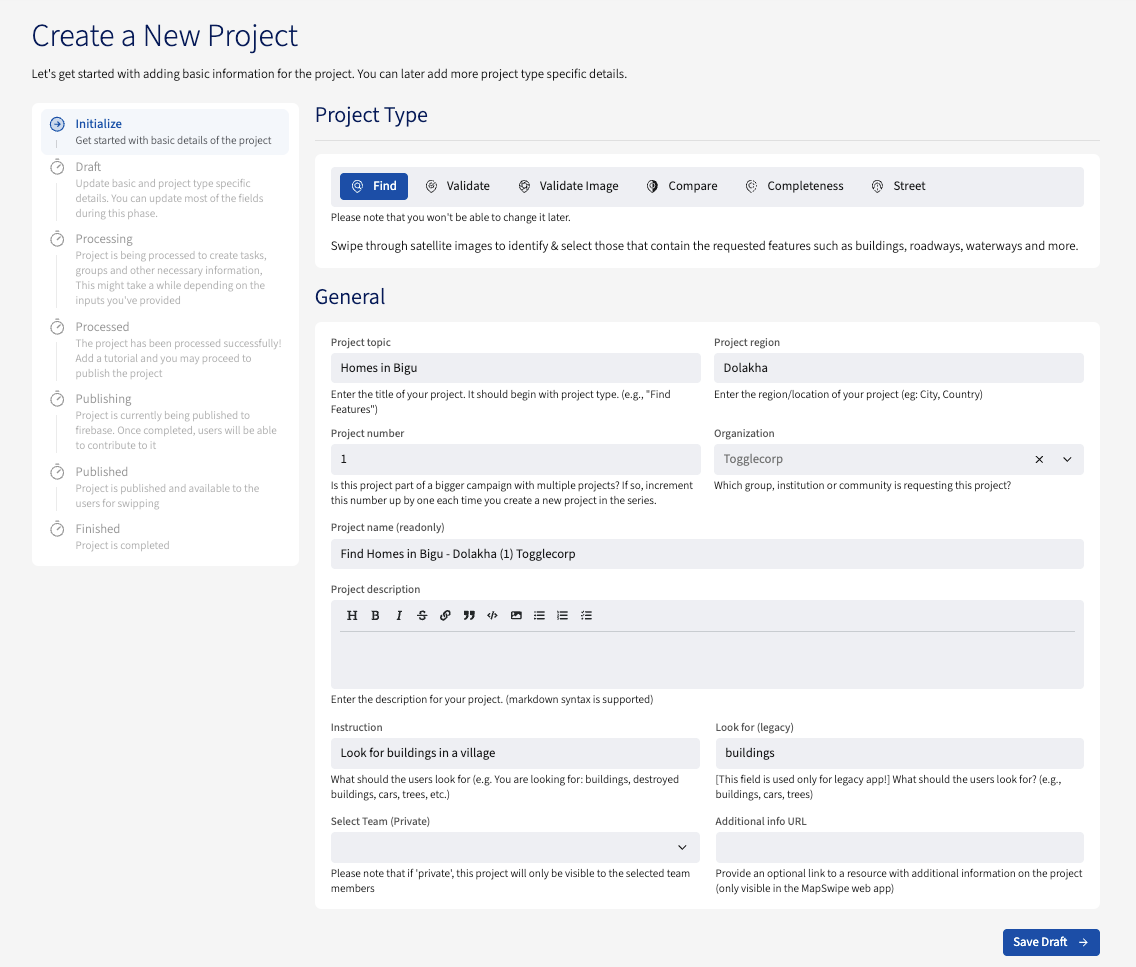
Go to the Project page and press the New Project button to open the Create a New Project form.
At a glance, the end-to-end flow looks like:
- Create the project up to the
Draftstage and save it.
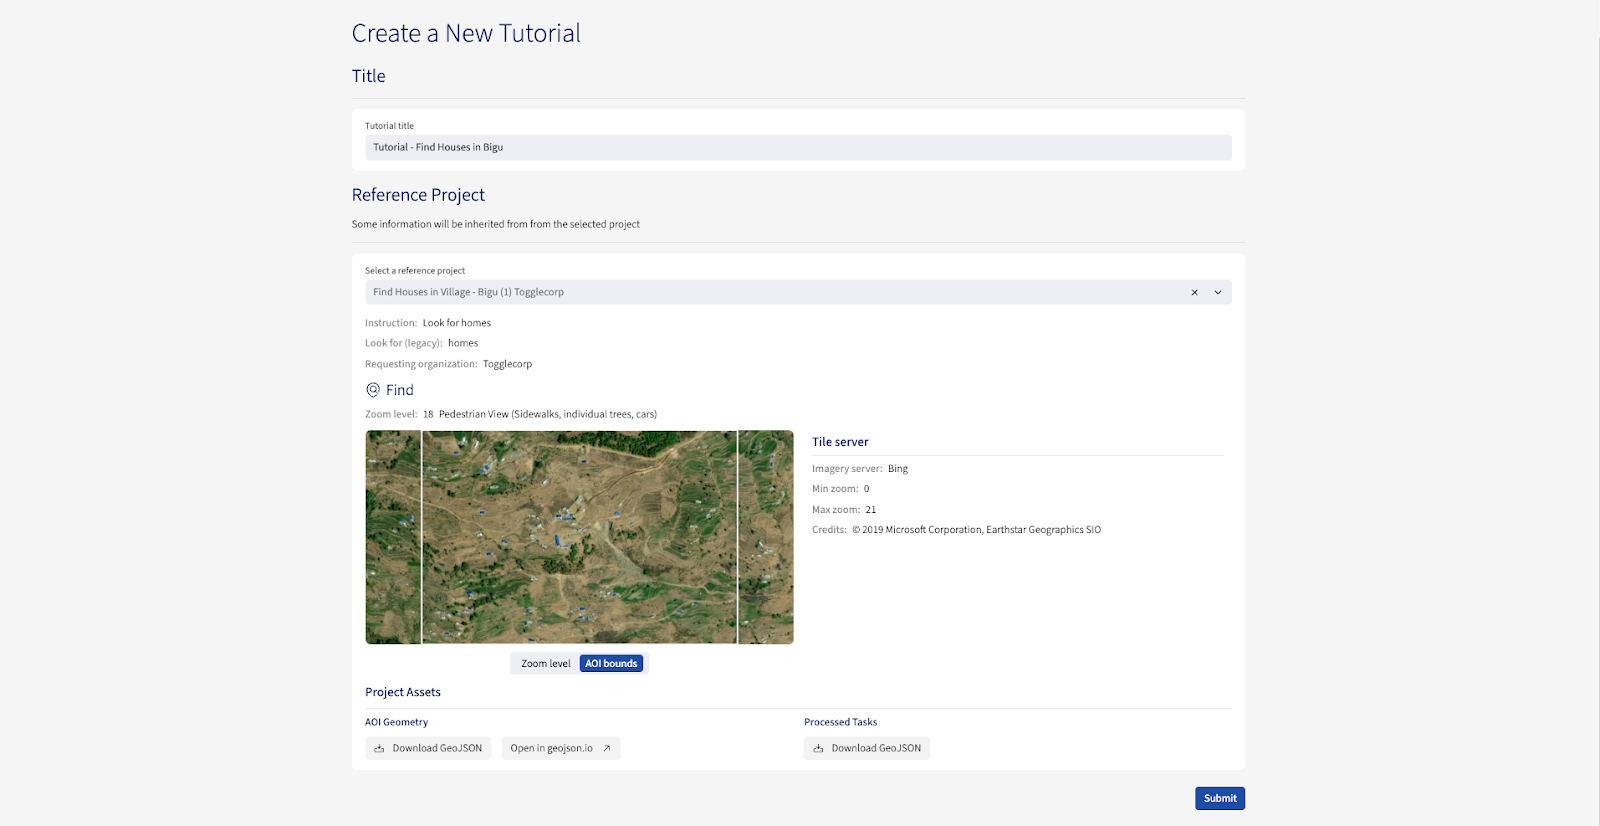
- Create a tutorial for the project, picking the new project as the reference project type. The tutorial pre-fills its AOI from the project.
- Complete the rest of the tutorial.
- Return to the project (now in at least the
Processedstage), attach the tutorial, and publish.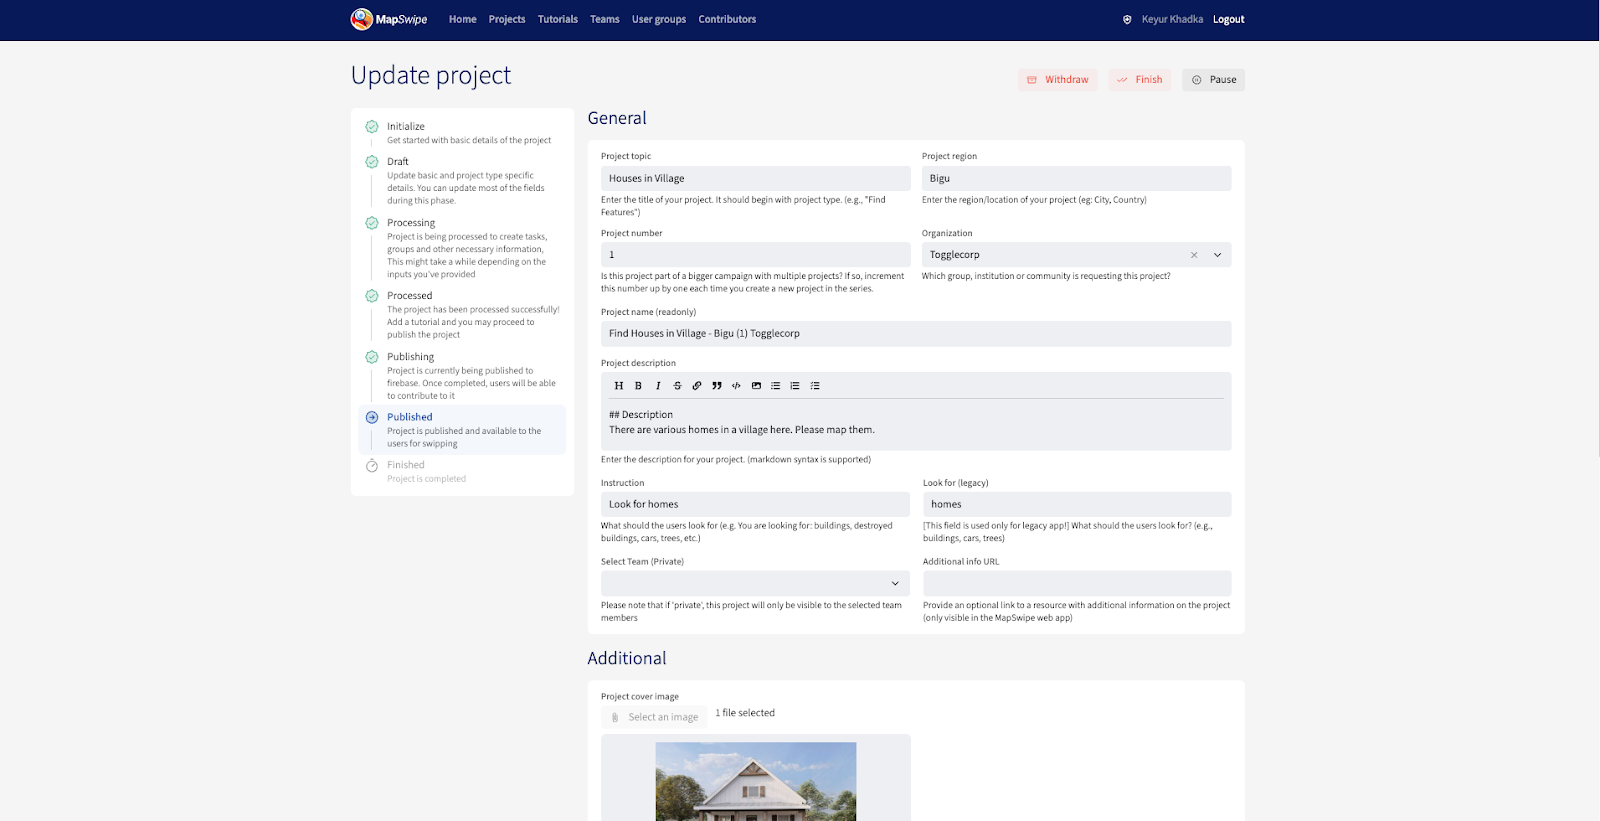
Creating a Project in Detail
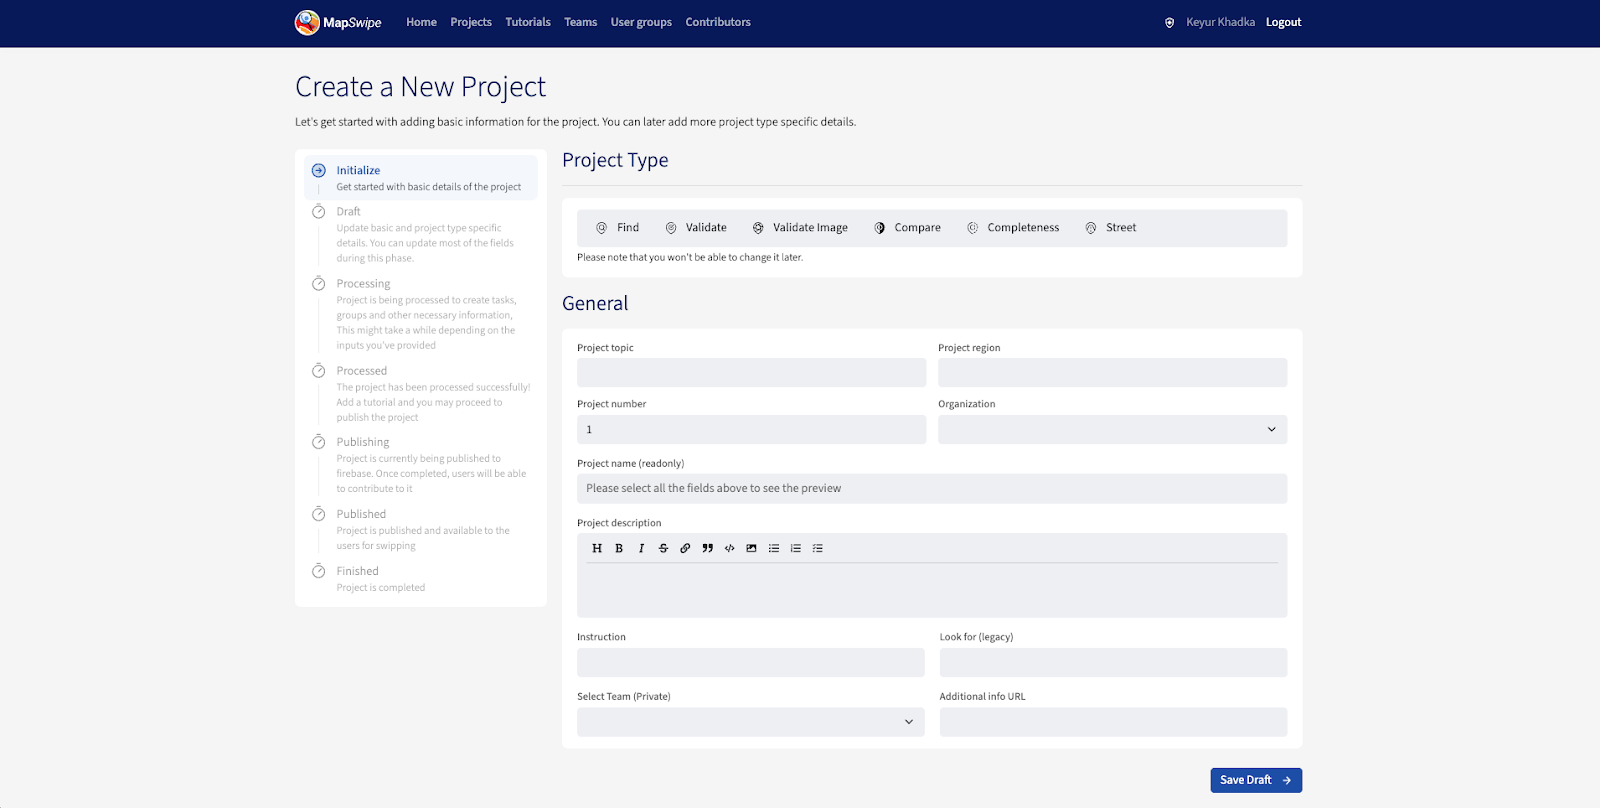
Initialize
Get started with the basic details of the project.
- Select a project type.
- Populate the fields under the General section.
- Click Save Draft to save the project in the
Draftstate. - You can return to the draft at any time to continue creating the project.
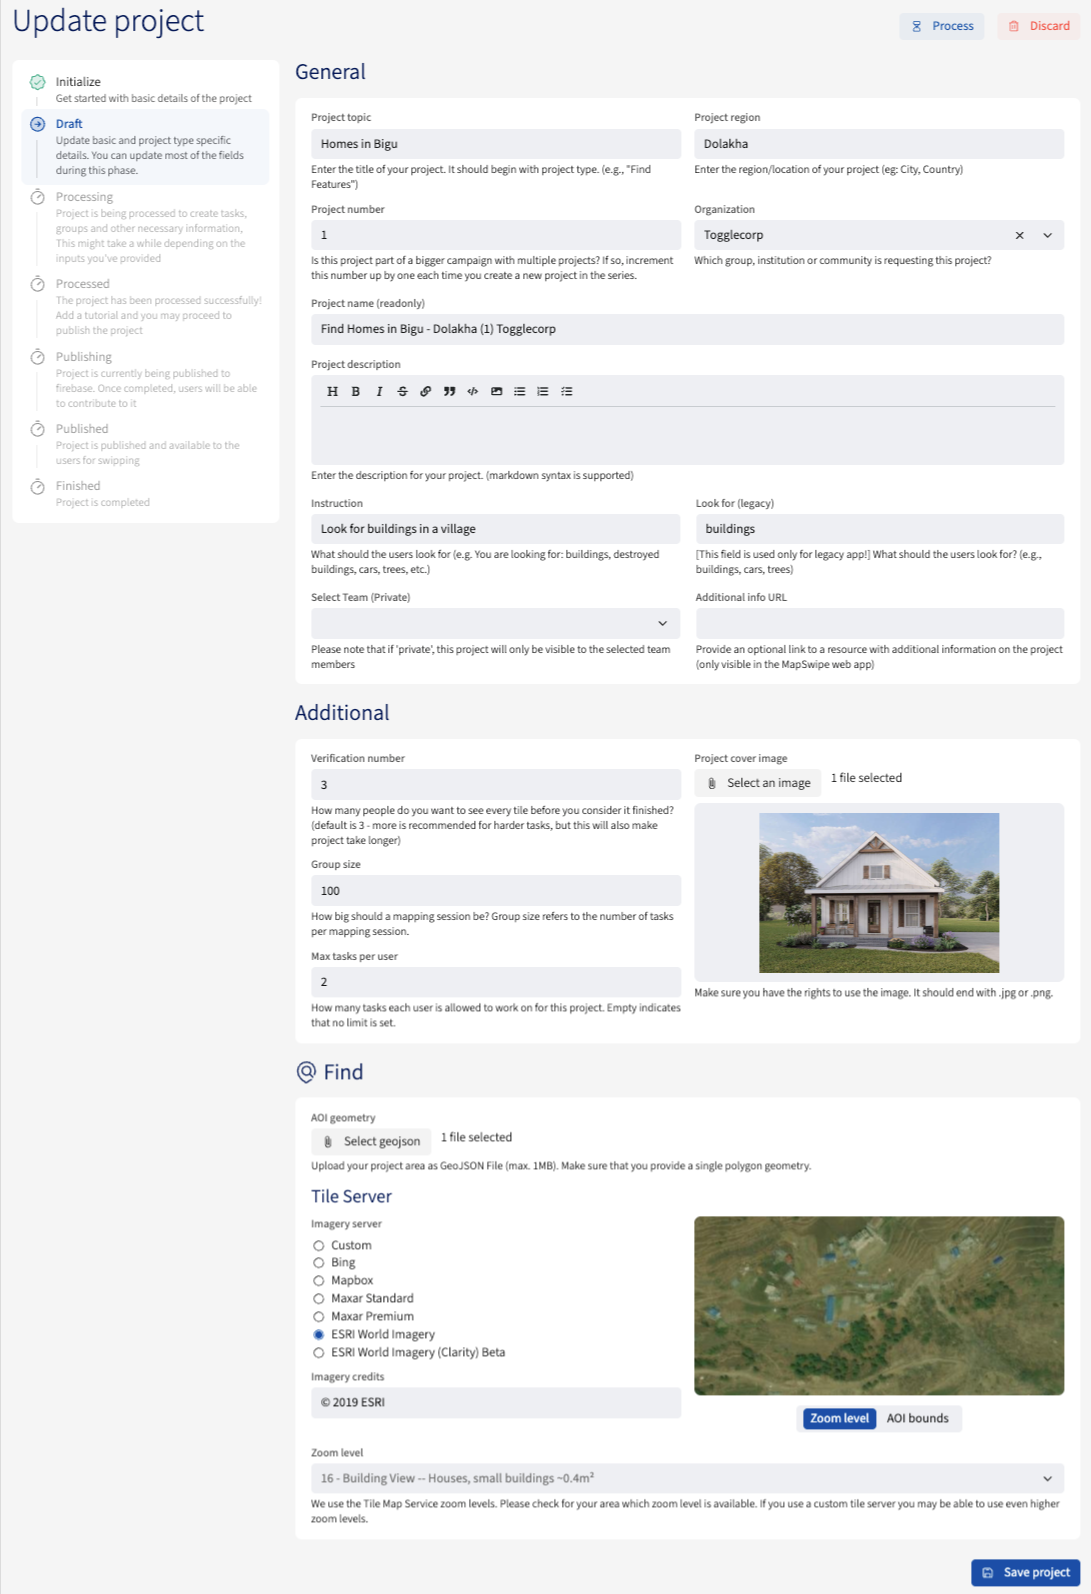
Draft
Update the basic and project-type-specific details. You can update most of the fields during this stage.
- The General information is already populated from the previous stage.
- You can edit it as needed; however, the project type is locked at this stage.
- Fields under the Additional section come with default values that can be edited.
- Upload a project cover image, or the default cover for the project type will be used.
- Fill in the Project type specific details section. The form changes per project type — see the Project Types docs for each type’s exact fields.
- Save the project.
- Once saved, submit the project for processing to move to the next stage.
Processing
The project is being processed to create tasks, groups, and other necessary information. This might take a while depending on the inputs you’ve provided.
Processed
The project has been processed successfully — add a tutorial and proceed to publish.
- The General, Additional, and Project type specific details sections are now populated.
- You can update the general information and the project cover image.
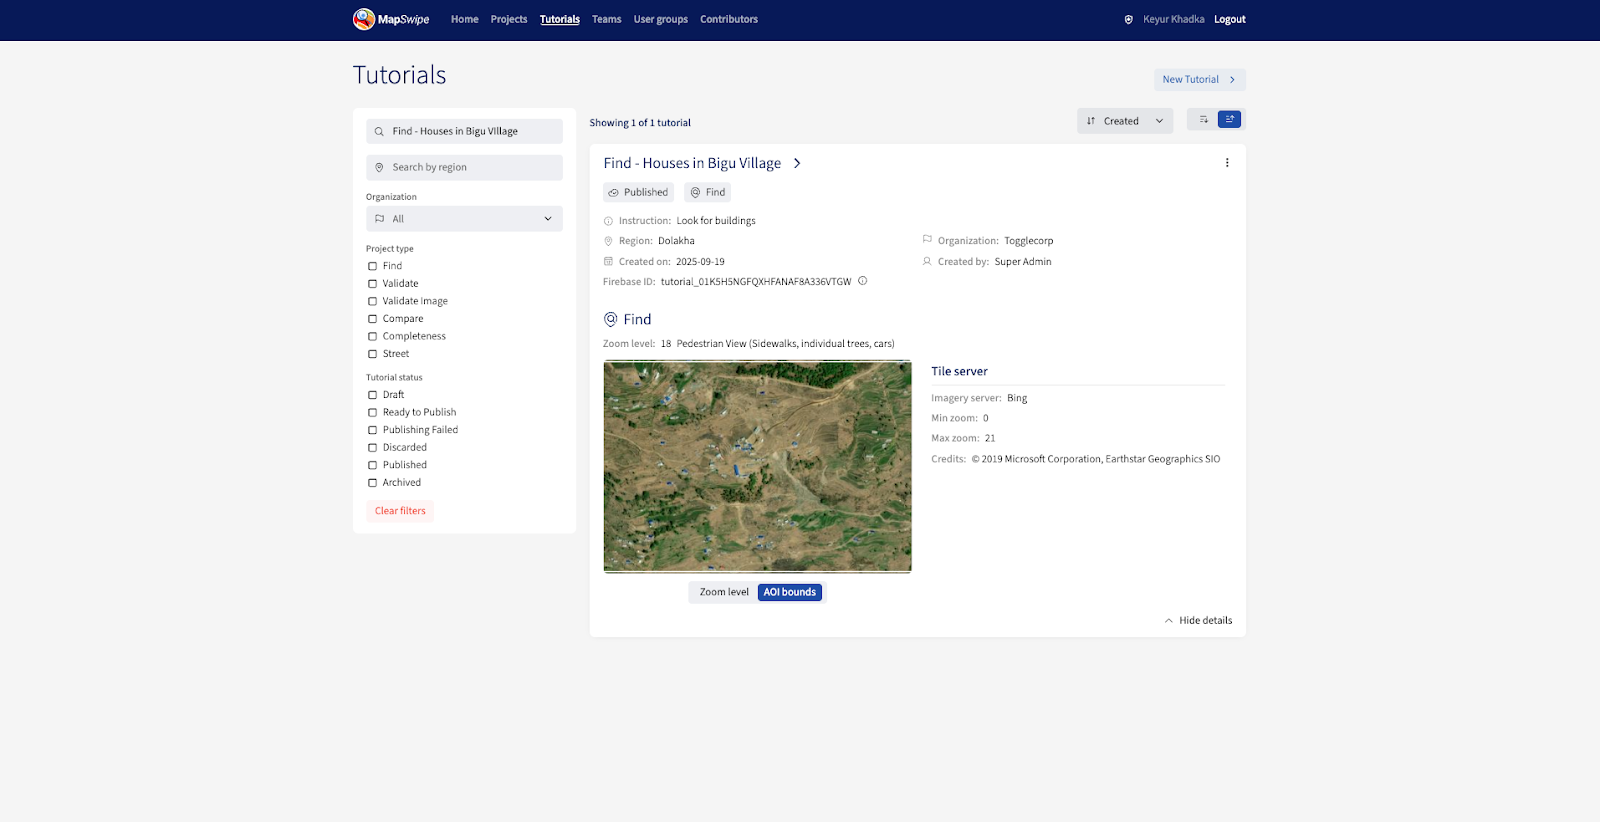
- Attach a tutorial of the matching project type from the list of options.
- If no suitable tutorial exists, or the project needs a custom tutorial, create the tutorial first and come back to continue project creation.
- Save the updated project, then publish it.
Publishing
The project is being published to Firebase. Once completed, users will be able to contribute to it.
Published
The project is published and available to users for swiping.
Once published, the project appears on the Manager Dashboard and in the mobile and web apps for contributors to begin mapping. A project notification is also posted to the mapswipe-projects-notifications Slack channel, with subsequent updates following in that message’s thread; important updates are mirrored to the channel itself.
Important notes when creating a project
General things to watch out for while creating a project:
- Make sure the project name is clear.
- The default verification count is
3— the progress algorithm assumes that baseline. Fewer people looking at each task reduces data quality; the best results we’ve seen come from a 5-person verification. - Re-read, correct, and improve the description that came with the request.
- Check the cover image format and size (max 1 MB); it’s used as the project thumbnail.
- Check the available satellite imagery for the area; good imagery is essential to keep a project going. If the imagery is unusable (poor resolution, cloud cover, etc.), adjust the area. Zoom to level 18 to inspect it.
Maximum allowed area for a project
Each project type has its own maximum area of interest (AOI).
Find Features
The maximum AOI size depends on the project’s zoom level, calculated by the formula 5 * (4 ** (23 - zoom_level)) sq km. Supported zoom levels range from 14 to 23:
| Zoom level | Max AOI area (sq km) |
|---|---|
14 | 1,310,720 (≈ size of Peru) |
15 | 327,680 |
16 | 81,920 |
17 | 20,480 |
18 | 5,120 |
19 | 1,280 |
20 | 320 |
21 | 80 |
22 | 20 |
23 | 5 |
At zoom level 14, the maximum (1,310,720 sq km) corresponds to the MAX_AOI_GEOMETRY_AREA constant in the backend.
The AOI GeoJSON must be a flat polygon. If your input exceeds the maximum for the chosen zoom level, split it into smaller pieces and create one project per piece — use geojson.io or QGIS to inspect or convert geometries.
Validate Footprints
The maximum AOI size is 2,500 sq km. This applies to all three creation methods: GeoJSON upload, GeoJSON external link, and HOT Tasking Manager ID (TMID).
The GeoJSON file should contain only simple polygons. Complex multi-polygon geometries (such as polygons with holes) are not supported.
Compare Dates
Same maximum AOI size and GeoJSON rules as Find Features.
Check Completeness
Same maximum AOI size and GeoJSON rules as Find Features.
View Streets
The maximum AOI size is 20 sq km.
The GeoJSON file should contain only simple polygons. Complex multi-polygon geometries (such as polygons with holes) are not supported.
Editing a Project
Project managers can edit a project’s basic details, listed below. The area-of-interest GeoJSON is locked once processed and cannot be changed.
Note
The project must be paused before any edits can be made.
- Project topic
- Additional info URL
- Project description
- Project image
- Project instruction
- Look for (legacy field)
- Project number
- Project region
- Tutorial used
Pausing and Resuming a Project
A published project can be paused to temporarily stop accepting contributions — paused projects don’t appear in the MapSwipe app. Pausing is also required before editing a project. A paused project can be resumed back to Published at any time.
Withdrawing a Project
A published project can be withdrawn when it should be permanently retracted from the app. Withdrawn is a terminal status — once withdrawn, the project cannot leave it.
Finishing a Project
A published project can be marked as finished by a manager at any time, regardless of progress percentage. Finished is a terminal status — once finished, the project cannot leave it.
Discarding a Project
Discarding retires a project that has not yet reached Published. It’s available while the project is still in Draft or Processed, or after a failed processing or publishing attempt (Processing Failed, Publishing Failed). Once a project is published, use Withdraw instead.
Status flow
Every project moves through one of the following statuses:
| Status | Meaning |
|---|---|
Draft | Creation has begun; the manager has saved the initial form but has not yet submitted the project for processing. |
Ready to Process | The project is queued for the background job that validates and tiles the GeoJSON. |
Processing Failed | Background processing did not complete; the project can be retried or discarded. |
Processed | Processing finished; the manager can now attach a tutorial and submit for publishing. |
Ready to Publish | The project is queued for the background job that makes it available in the apps. |
Publishing Failed | Background publishing did not complete; the project can be retried or discarded. |
Published | The project is live in the MapSwipe app and accepting mapping contributions. |
Paused | A published project that is temporarily not accepting contributions; can be resumed back to Published. |
Withdrawn | A published project that has been intentionally retracted from the app. Terminal. |
Finished | A published project that a manager has marked as finished — at any time, regardless of progress. Terminal. |
Discarded | The project was retired before reaching Published. Terminal. |
stateDiagram-v2
    direction TB
    state "Ready to Process" as Ready_to_Process
    state "Processing Failed" as Processing_Failed
    state "Ready to Publish" as Ready_to_Publish
    state "Publishing Failed" as Publishing_Failed

    Draft --> Ready_to_Process : process
    Draft --> Discarded : discard
    Ready_to_Process --> Processed : background job succeeds
    Ready_to_Process --> Processing_Failed : background job fails
    Processing_Failed --> Ready_to_Process : retry
    Processing_Failed --> Discarded : discard
    Processed --> Ready_to_Publish : publish
    Processed --> Discarded : discard
    Ready_to_Publish --> Published : background job succeeds
    Ready_to_Publish --> Publishing_Failed : background job fails
    Publishing_Failed --> Ready_to_Publish : retry
    Publishing_Failed --> Discarded : discard
    Published --> Paused : pause
    Published --> Withdrawn : withdraw
    Published --> Finished : mark finished
    Paused --> Published : resume
The four arrows out of Ready to Process and Ready to Publish are driven by background jobs rather than manager actions; every other arrow corresponds to a manager action taken from the dashboard.